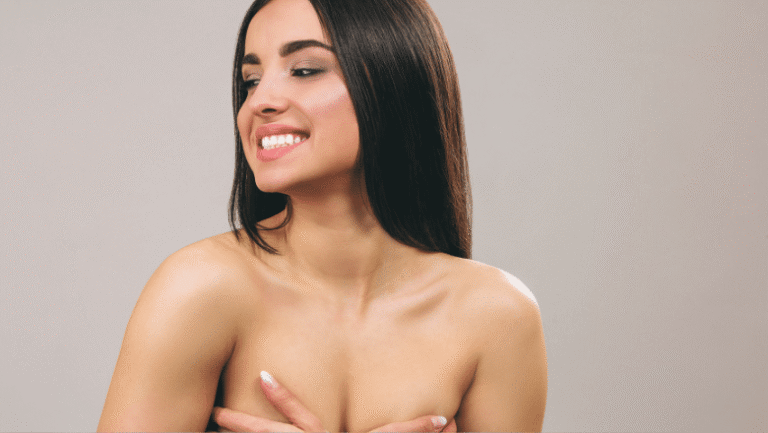
The concern about looking overfilled after facial fat transfer is one of the most common reasons patients hesitate before scheduling the procedure. The fear is understandable — images of celebrities with unnaturally round, puffy faces have made overfilling a visible aesthetic risk that no one wants to repeat. The honest answer is that when fat transfer is performed by an experienced surgeon using modern micro-fat grafting technique, with appropriate volume planning and patience through the swelling phase, the final result looks natural and rested rather than puffy or altered.
But the procedure isn’t risk-free. Overcorrection, irregular fat distribution, and unrealistic patient expectations can all produce results that look overfilled. This guide explains why overfilling happens, the technical and clinical factors that prevent it, what to expect through the recovery period, and the honest decision framework for whether fat transfer or an alternative approach is the right choice.
What facial fat transfer actually is
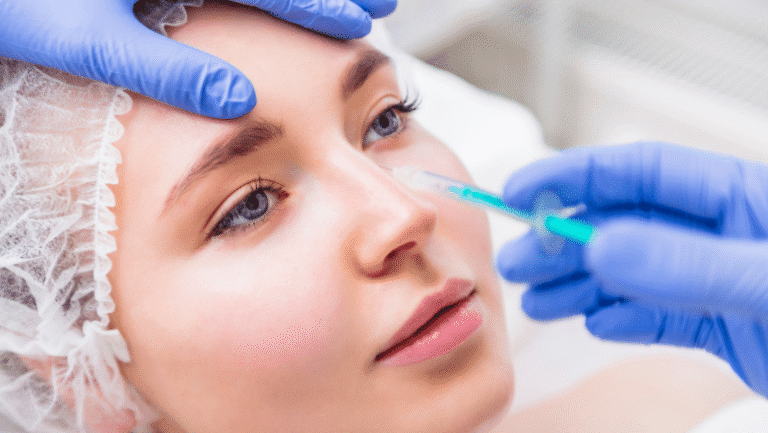
Fat transfer to the face — also called fat grafting, autologous fat transfer, or facial lipofilling — is a surgical procedure that takes fat from one part of the body and reinjects it into areas of the face that have lost volume. The fat comes from your own body, typically harvested from the abdomen, thighs, or flanks via gentle liposuction.
The procedure has three stages:
1. Harvesting. Fat is gently extracted using small-bore liposuction cannulas designed to minimise mechanical damage to fat cells. The donor site is chosen based on where excess fat is available and where the patient won’t notice a small reduction.
2. Processing. The harvested fat is purified to remove blood, oil, and damaged cells. Modern techniques use centrifugation, decantation, or filtration to isolate the healthy fat cells that will best survive the transfer.
3. Re-injection. Small amounts of purified fat are placed into the target facial areas using fine microcannulas. The fat is layered carefully at different depths to build smooth, natural contour rather than concentrated lumps.
The result is volume restoration using your own tissue, which integrates with surrounding facial fat and becomes part of your natural anatomy once a blood supply is established.
Why overfilling happens
Several factors can produce an overfilled appearance after fat transfer:
Surgeon overcorrection. Because not all transferred fat survives long-term, surgeons often add slightly more fat than the patient ultimately needs — anticipating absorption. If the overcorrection is excessive, or if more fat than expected survives, the final result can look fuller than intended.
Poor injection technique. Placing fat in large boluses (single concentrated injections) rather than distributed micro-droplets produces uneven, lumpy results. Modern micro-fat grafting technique uses thousands of tiny placements rather than a few large ones.
Wrong areas filled. Adding volume to areas that don’t need it — or in proportions that don’t match the patient’s facial anatomy — produces results that look “done” rather than refreshed. The cheek that suits a 25-year-old face often doesn’t suit the same patient at 55, and vice versa.
Patient pressure for more. Patients sometimes pressure surgeons to “make it really obvious” or “fill it properly” — and surgeons who comply rather than push back produce the overfilled outcomes patients later regret.
Confusing swelling with the final result. The face is significantly swollen for weeks after fat transfer. Patients who panic at week 2 about looking too full often have a perfectly reasonable result hidden under transient swelling.
The patients who end up genuinely overfilled are typically those who had aggressive overcorrection, were treated with bolus technique, were treated in areas that didn’t suit volume restoration, and continued to feel they wanted more even after substantial work was done.
How modern technique prevents overfilling
The technical evolution of fat transfer has substantially reduced the risk of overfilling when the procedure is performed well:
Micro-fat grafting. Rather than placing larger volumes in single boluses, modern technique places tiny droplets (typically 0.1ml or less per pass) at multiple depths and locations. The result is smooth, distributed volume that integrates predictably with surrounding tissue. Lumpiness and overcorrection both become less likely.
Nanofat for specific applications. An even finer fat preparation can be used for delicate areas like the tear trough or fine perioral lines — areas where standard fat grafting risks lumpiness. Nanofat doesn’t add as much volume but improves skin quality and texture.
Layered placement. Fat is placed at multiple depths in each treated area — deep within the fat compartments, in the subcutaneous layer, and sometimes at the dermal-subcutaneous junction. The layered approach produces three-dimensional contour rather than a single layer of bulk.
Conservative volumes. Experienced surgeons place less fat than patients sometimes expect, knowing that the immediate post-procedure appearance reflects swelling rather than the final result. The patient who looks under-corrected at day 3 is often perfectly corrected at month 3.
Realistic discussion at consultation. Good fat transfer planning includes honest discussion of what’s achievable, what’s likely to look natural, and what would risk overfilling. The patient who arrives wanting “as much fat as you can put in” should hear back the reasons why that approach typically produces worse outcomes than conservative volumes.
The swelling timeline — why patients think they’re overfilled when they’re not
Swelling after fat transfer is significant and follows a predictable timeline. Understanding what to expect prevents unnecessary panic about the early appearance:
Days 1 to 3. Maximum swelling. The face looks visibly puffy, often with bruising. Patients commonly worry that the result is too full — but at this stage, the swelling can be several times the actual fat volume placed.
Days 4 to 7. Swelling begins to subside but remains prominent. Most patients are not yet socially ready to be seen, though most can manage with high collars and sunglasses if needed.
Weeks 2 to 4. Significant improvement. The major swelling has resolved. The face still looks fuller than it ultimately will, but the dramatic puffiness is gone.
Months 1 to 3. Continued refinement. Subtle swelling continues to resolve as the body reabsorbs the inflammatory fluid associated with the procedure. Simultaneously, some of the transferred fat is being reabsorbed (the percentage that doesn’t establish a blood supply).
Month 3 onwards. The result stabilises. The surviving fat has integrated, the body has fully resolved post-operative inflammation, and what you see now is essentially the final result.
The crucial point: judging the result before month 3 produces unreliable assessments. The face that looks unnaturally full at week 4 typically looks naturally refreshed by month 3.
Fat survival — how much actually stays
A central question in any fat transfer procedure: what percentage of transferred fat survives long-term?
Published data and our clinical experience suggest **50 to 70% of transferred fat survives** as long-term integrated tissue. The remainder is reabsorbed by the body within the first few months — fat cells that didn’t establish a blood supply in their new location die and are cleared.
This is why surgeons add slightly more fat than the final desired volume — anticipating the 30 to 50% that will be reabsorbed. The challenge is calibrating the overcorrection correctly. Too little and the final result is under-corrected. Too much and the patient ends up overfilled.
Factors affecting fat survival rate:
Technique quality. Gentle harvesting, proper processing, and careful injection all maximise the survival rate. Aggressive technique that mechanically damages fat cells reduces survival.
Recipient site. Areas with good blood supply (cheeks, malar) accept fat better than areas with poorer supply (very delicate periorbital areas).
Patient factors. Smokers experience reduced fat survival due to impaired vascular supply. Patients with significant weight fluctuations after treatment can lose or gain fat in the treated areas.
Volume per session. Smaller volumes typically survive better proportionally than very large volumes — there’s a limit to how much fat the recipient bed can support before survival rates drop.
At Centre for Surgery, our technique aims to maximise fat survival within the realistic range — typically achieving the higher end of the 50 to 70% survival window through careful processing and conservative volume per session.
Which facial areas commonly receive fat transfer
Different areas have different requirements and risks:
Cheeks (malar area). The most common area for fat transfer. Good blood supply produces reliable take rates. Volume restoration here addresses the deflation that drives much of facial ageing.
Temples. Often deflate substantially with age. Volume restoration can dramatically refresh the upper face. Conservative placement is essential — overfilling the temples produces an unnatural fullness.
Tear trough. A specialised application requiring nanofat or very careful micro-fat technique. The thin skin and visible vascular structure make this area prone to lumpiness with conventional fat grafting. For more on the alternative non-surgical approach, see our tear trough filler guide.
Jawline and chin. Restoration of definition that thins with age. Often combined with chin augmentation procedures.
Nasolabial folds and marionette lines. The lower face folds can be softened with fat transfer, though combination with other treatments often produces better results. See our guide on marionette lines for the broader treatment options.
Lips. Lip fat transfer is performed in some cases as an alternative to lip filler, but with significant caveats — lip fat survival is variable and the technical demands are high. Most patients are better served by lip filler.
Periorbital and brow areas. Restoration of upper face volume can complement blepharoplasty or brow lift surgery.
For broader anti-ageing planning context, see our anti-ageing treatments hub.
Fat transfer vs dermal filler — which is right for me?
Fat transfer and dermal filler address similar concerns (volume loss) through different mechanisms, and each has distinct advantages:
Fat transfer advantages:
- Permanent for the surviving fat — no ongoing maintenance once integrated
- Uses your own tissue — no synthetic material in the face
- Can correct larger volume deficits than filler practically can
- Soft, natural feel when properly distributed
- Liposuction donor site provides a small body contouring benefit
Dermal filler advantages:
- Outpatient procedure — no surgery, no general anaesthesia (for face fat transfer)
- No donor site recovery
- Predictable, reversible with hyalase if results aren’t what was wanted
- Lower cost per session, though requiring ongoing maintenance
- No risk of fat necrosis or oil cyst formation
- Faster recovery — minimal downtime versus 2 to 3 weeks for fat transfer
The honest decision framework:
- For modest volume restoration that you want reversible if needed → filler
- For larger volume needs in deep facial compartments → fat transfer
- For combination with surgery (facelift, blepharoplasty) → fat transfer often pairs well
- For ongoing maintenance preference → filler
- For single permanent intervention preference → fat transfer
- For patients with no available donor fat → filler
For patients who have already accumulated significant filler over years, dissolving accumulated filler before considering fat transfer is sometimes the right sequencing.
Combining fat transfer with surgery
Fat transfer is often combined with other facial procedures to address both structural and volume components of facial ageing in a single anaesthetic episode:
With facelift. Fat transfer to deflated areas (temples, mid-face) complements the structural lift of facelift surgery. The combination addresses both descent and deflation, which often coexist in ageing.
With blepharoplasty. Periorbital fat transfer can restore volume around the eyes that’s lost alongside the excess skin addressed by blepharoplasty. See our guide on transconjunctival vs transcutaneous lower blepharoplasty.
With brow lift. Forehead and temple volume restoration combined with brow elevation produces a more comprehensive upper face refreshment than either alone.
With chin and jaw augmentation. Defining the lower face contour with combined approaches.
Combination procedures need to be planned holistically. Discussion at consultation establishes which combinations match your specific needs and recovery preferences.
Risks specific to fat transfer
Beyond the general risks of any surgical procedure, fat transfer has specific risks worth understanding:
Variable take rates. The 50 to 70% survival range is an average — individual results vary. Some patients achieve higher survival, some lower. Predicting which patient will fall where isn’t always possible.
Fat resorption beyond expected. Occasionally patients lose more transferred fat than anticipated, particularly in areas with weaker blood supply or in patients with adverse healing factors. A small touch-up procedure can address this if needed, typically 6 to 12 months after the initial procedure.
Asymmetry. Uneven survival between the two sides of the face can produce asymmetry. Minor cases can be addressed with small filler touch-ups; more significant cases may need a small revision fat transfer.
Lumps and irregularities. Larger fat boluses or poor distribution can produce palpable or visible lumps. Massage can sometimes smooth these; persistent lumps may require minor revision.
Fat necrosis. Rarely, transferred fat dies in a localised area and forms an oil cyst or calcified nodule. Treatment options include observation, aspiration, or surgical excision depending on size and location.
Donor site complications. The small liposuction at the donor site can produce bruising, mild contour irregularities, or rarely seroma formation. These are typically minor and self-resolving.
Overcorrection. The subject of this guide — too much surviving fat producing a fuller result than the patient wanted. Difficult to reverse — unlike filler, fat can’t be dissolved with an enzyme. Treatment options include time (some additional reabsorption over years), small revision liposuction of the area, or careful waiting and acceptance.
The reversibility difference is significant — filler offers exit options that fat transfer does not. This is one of the reasons conservative initial volume is so important.
Recovery timeline and return to normal activities
A typical recovery pattern:
Day 1. Discharge home. Significant swelling and bruising. Soft foods, gentle activity. Sleep with head elevated. Cold compresses help with swelling.
Days 2 to 7. Continued swelling and bruising. Most patients work from home or take time off entirely. Bruising at donor site (where fat was harvested) and at facial injection sites.
Week 2. Swelling subsiding significantly. Some patients return to work with makeup covering residual bruising. Light exercise can be resumed cautiously.
Weeks 3 to 4. Majority of visible swelling resolved. Normal activities resumed. The face still looks fuller than the final result but is socially presentable.
Months 2 to 3. Continued subtle refinement. Final result emerging.
Month 3 onwards. Stable result. The fat that has survived is now permanently integrated.
Pre-operative preparation:
- Stop smoking 4 to 6 weeks before surgery — smoking significantly reduces fat survival
- Avoid blood-thinning medications and supplements for a week before (with your prescriber’s approval)
- Avoid alcohol for 48 hours before
- Arrange transport home and someone to help for the first day or two
- Plan 2 to 3 weeks of reduced social activity
Post-operative care:
- Compression garment at the liposuction donor site for several weeks
- Cold compresses to the face for the first few days
- Head elevated when sleeping
- Gentle activity initially; no strenuous exercise for 2 to 3 weeks
- No facial massage or pressure on treated areas for at least 4 to 6 weeks while fat is establishing blood supply
- SPF protection on healing skin
- Follow-up appointments at standard intervals
Cost
Fat transfer to the face is priced based on the extent of treatment, the donor site requirements, and whether the procedure is combined with other surgery. Combined procedures (fat transfer with facelift or blepharoplasty, for example) typically offer better value than separate procedures.
Finance options through Chrysalis Finance, including 0% APR, are available across surgical procedures.
Indicative pricing requires individual consultation — the bespoke quotation depends on which areas are being treated, donor site choice, and any combined procedures.
Common questions
How painful is the procedure?
Fat transfer is performed under general anaesthesia or TIVA, so there’s no pain during the procedure itself. Post-operative discomfort is mild to moderate — typically managed with paracetamol and occasional codeine. The donor site is usually more uncomfortable than the face for the first few days.
How long before I can return to work?
Most patients return to work within a week to ten days. By this point, swelling and bruising can be covered with makeup. Patients who can work from home often return earlier.
Will I need more than one session?
Most patients achieve their desired result in a single session. Occasionally a small touch-up is helpful 6 to 12 months later to address areas where fat survival was less than anticipated. Touch-up procedures are typically smaller, easier, and less expensive than the initial treatment.
What if I gain or lose weight afterwards?
The transferred fat behaves like the body’s other fat — it expands with weight gain and shrinks with weight loss. Major weight fluctuations after fat transfer can change the appearance of the result. Patients who are already at a stable weight typically achieve the most consistent long-term results.
Is the result really permanent?
The fat that establishes a blood supply and survives the first 3 months is permanent integrated tissue. It ages with you and is affected by weight changes, but it doesn’t disappear over time the way filler does. Natural facial ageing continues — the fat doesn’t prevent future ageing changes.
Can fat transfer go wrong?
Like any surgical procedure, complications are possible — the section on risks above covers these. The most common “wrong” outcome is variable fat survival producing an under-corrected or asymmetric result. True overcorrection — looking obviously overfilled — is uncommon with proper technique and is the focus of this guide because it’s the outcome patients fear most.
Can I have fat transfer if I’m very slim?
You need enough donor fat to harvest the volume required. Patients with very little body fat may not have sufficient donor tissue. In some cases, alternative donor sites (knees, back, even arm) can be used; in others, filler is a more practical option.
Will fat transfer make me look like a different person?
No. Done well, fat transfer restores volume that ageing has removed — you look like a more rested, refreshed version of yourself, not someone different. Friends typically comment that you look well or healthy without being able to identify why.
How does fat transfer compare with combining filler treatments over time?
For modest needs, regular filler is often more practical and cost-effective. For larger volume needs or for patients tired of ongoing filler maintenance, fat transfer becomes more economic over a 5-10 year horizon. Discussion at consultation establishes which approach matches your goals and circumstances.
Centre for Surgery · CQC-regulated · GMC specialist-registered surgeons · 95–97 Baker Street, Marylebone, London W1U 6RN · 0207 993 4849 · Book a consultation · Finance from 0% APR